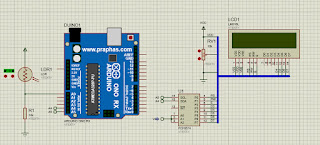
ปุ่มหลายปุ่มบนขา1 Analog

หลักการทำงาน
ขาanalogจะรับค่าไฟจากสวิท ่งสวิทนี้นจะมีค่าความต้านทานต่างกันจึงทำให้แยกแยะป่มุ
ได้CODE
/* Multiple buttons on one Analog pin Example
Use 4 buttons to one bus to control 4 LEDs
Dev: Vasilakis Michalis // Date: 1/7/2015 // www.ardumotive.com */
//Constants
const int yellowLed = 2;
const int redLed = 3;
const int blueLed = 4;
const int greenLed = 5;
//Variables
int buttonValue; //Stores analog value when button is pressed
void setup()
{
pinMode(yellowLed, OUTPUT);
pinMode(redLed, OUTPUT);
pinMode(blueLed, OUTPUT);
pinMode(greenLed, OUTPUT);
}
void loop()
{
buttonValue = analogRead(A0); //Read analog value from A0 pin
//For 1st button:
if (buttonValue>=1010 && buttonValue<=1015){
digitalWrite(yellowLed, HIGH);
}
//For 2nd button:
else if (buttonValue>=1000 && buttonValue<=1008){
digitalWrite(redLed, HIGH);
}
//For 3rd button:
else if (buttonValue>=990 && buttonValue<=998){
digitalWrite(blueLed, HIGH);
}
//For 4th button:
else if (buttonValue>=870 && buttonValue<=880){
digitalWrite(greenLed, HIGH);
}
//No button pressed, turn off LEDs
else{
digitalWrite(yellowLed, LOW);
digitalWrite(redLed, LOW);
digitalWrite(blueLed, LOW);
digitalWrite(greenLed, LOW);
}
delay(100);
}


ความคิดเห็น
แสดงความคิดเห็น